

在鸿蒙版天气预报应用中引入Flutter Staggered Grid View三方库实现 多城市天气卡片实战教程
目录
- 概述
- 引入三方库步骤
- 天气详情页面实战案例
- 常见错误及解决方案
- 总结
概述
本章节主要详细介绍在使用跨平台框架Flutter开发鸿蒙应用程序,使用Flutter三方库 flutter_staggered_grid_view 库实现多城市天气卡片堆叠式展示和滑动切换功能。
🎯 本教程目标
通过本教程,你将学会:
- ✅ 如何在 Flutter 项目中引入
flutter_staggered_grid_view相关依赖 - ✅ 如何实现多城市天气卡片的堆叠式展示
- ✅ 如何实现左右滑动切换城市卡片
- ✅ 如何在天气详情页面中使用堆叠式卡片实现多城市天气切换
- ✅ 如何实现滑动回调和撤销滑动功能
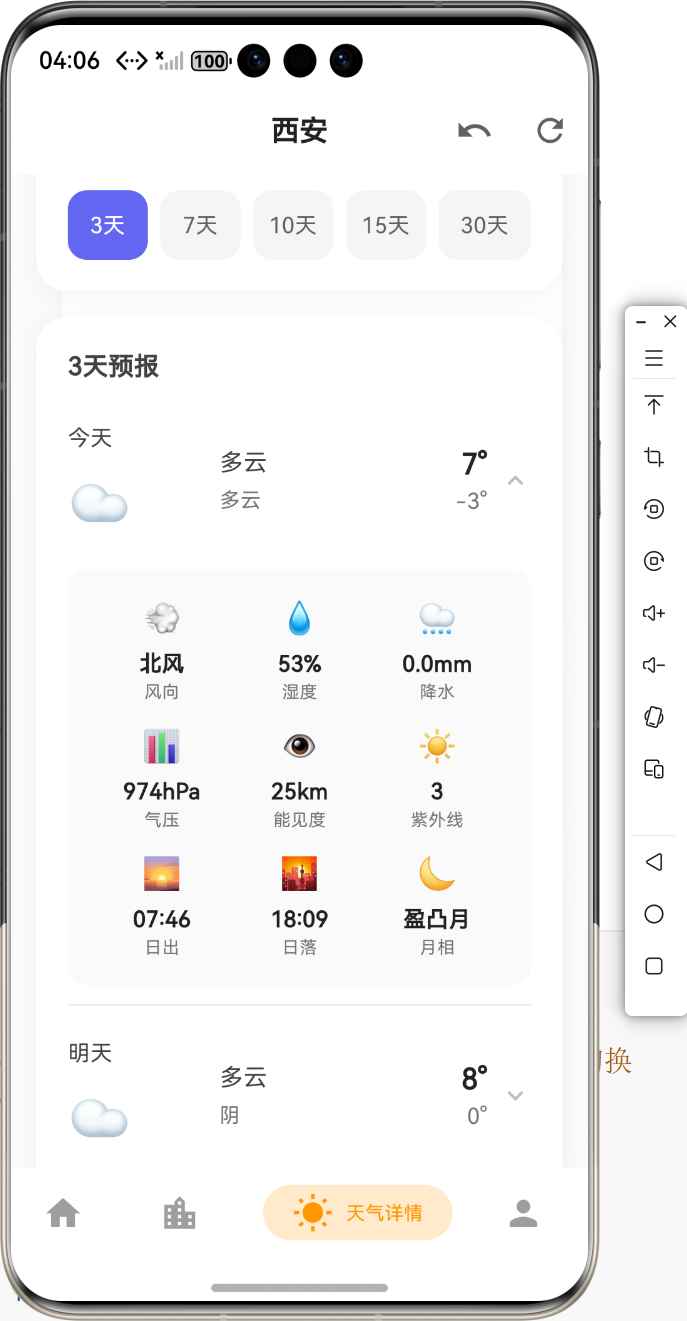
- ✅ 最终在鸿蒙设备上运行效果如下图所示

📁 项目文件结构
在开始之前,让我们先了解一下项目结构:
lib/
├── models/                       # 数据模型目录
│   ├── weather_models.dart      # 📊 天气数据模型定义
│   └── weather_models.g.dart     # ⚙️ 自动生成的 JSON 序列化代码
└── screens/                      # 页面文件目录
    └── weather_detail_page.dart  # 🌤️ 天气详情页面(使用堆叠式卡片)
🎯 本教程将修改的文件
严格按照以下顺序修改文件,每个步骤完成后立即验证:
pubspec.yaml- 📦 添加flutter_staggered_grid_view依赖lib/screens/weather_detail_page.dart- 🌤️ 天气详情页面,实现多城市卡片切换
🛠️ 技术栈
- flutter_staggered_grid_view: 堆叠式网格视图库
- http: HTTP 客户端库(用于获取天气数据)
- shared_preferences: 本地存储库(用于读取城市列表)
- json_annotation: JSON 序列化注解支持(用于数据模型)
🌤️ 功能特性
- 🎴 堆叠式展示:多个城市天气卡片以堆叠方式展示
- 👆 左右滑动:支持左右滑动切换城市
- ↩️ 撤销滑动:支持撤销滑动,回到上一个城市
- 🔄 滑动回调:提供滑动回调,实时更新当前城市
- 📱 响应式布局:适配不同屏幕尺寸
引入三方库步骤
📋 流程图概览
📝 步骤 1:添加依赖到 pubspec.yaml
步骤 1.1:打开 pubspec.yaml 文件
文件路径: pubspec.yaml(项目根目录)
操作说明:
- 📂 在 IDE 中打开项目根目录
- 📄 找到并打开
pubspec.yaml文件 - 👀 确认文件内容,找到
dependencies:部分
步骤 1.2:添加运行时依赖
位置: pubspec.yaml 文件的 dependencies: 部分(约第49行)
操作步骤:
- 📍 找到
dependencies:部分 - 📝 在
json_annotation: ^4.8.1之后添加以下内容:
dependencies:
  flutter:
    sdk: flutter

  # ... 其他依赖 ...

  # JSON 序列化支持
  json_annotation: ^4.8.1
  # 堆叠式网格视图
  flutter_staggered_grid_view: ^0.7.0
验证:
- ✅ 确认缩进正确(使用2个空格)
- ✅ 确认版本号正确
- ✅ 确认没有语法错误(冒号、引号等)
版本说明:
flutter_staggered_grid_view: ^0.7.0- 堆叠式网格视图库
重要提示:
- ⚠️ 如果版本冲突,可以运行
flutter pub upgrade升级所有依赖
步骤 1.3:保存文件
操作说明:
- 💾 保存
pubspec.yaml文件(Ctrl+S 或 Cmd+S) - ✅ 确认文件已保存
⬇️ 步骤 2:安装依赖
操作步骤:
-
📂 打开终端(Terminal),切换到项目根目录
cd /path/to/your/project -
⌨️ 执行以下命令:
flutter pub get -
⏳ 等待安装完成(可能需要10-30秒)
命令说明:
flutter pub get- 下载并安装所有在pubspec.yaml中声明的依赖包- 安装成功后,依赖包会被下载到项目的
.dart_tool目录
预期输出:
Running "flutter pub get" in ffohnotes...
Resolving dependencies...
Got dependencies!
验证:
- ✅ 确认终端显示 “Got dependencies!”
- ✅ 确认没有错误信息
✅ 步骤 3:验证安装
操作步骤:
-
📄 检查
pubspec.lock文件,确认 flutter_staggered_grid_view 已安装 -
🔍 在代码中尝试导入库:
import 'package:flutter_staggered_grid_view/flutter_staggered_grid_view.dart'; -
✅ 确认 IDE 没有报错(红色波浪线)
验证:
- ✅ 确认
pubspec.lock中包含flutter_staggered_grid_view: 0.7.0 - ✅ 确认导入语句没有错误
天气详情页面实战案例
📄 文件说明:lib/screens/weather_detail_page.dart
文件作用: 天气详情页面 UI 实现,使用堆叠式卡片展示多城市天气,支持滑动切换
flutter_staggered_grid_view 使用位置:
- 导入库:文件开头导入
flutter_staggered_grid_view - 堆叠式卡片视图:
_buildStaggeredGridView()方法中使用 Stack 和 PageView 实现堆叠效果 - 城市卡片构建:
_buildCityCard()方法构建单个城市卡片
📋 多城市天气卡片切换实现流程图
🎯 天气详情页面实现的功能模块
1. 📦 添加导入语句
文件路径: lib/screens/weather_detail_page.dart
操作步骤:
- 📝 在文件开头添加导入语句:
// 导入 Flutter Material 设计库
import 'package:flutter/material.dart';
// 导入 http HTTP 客户端
import 'package:http/http.dart' as http;
// 导入 flutter_staggered_grid_view 用于堆叠式卡片展示
import 'package:flutter_staggered_grid_view/flutter_staggered_grid_view.dart';
// 导入 shared_preferences 用于读取城市列表
import 'package:shared_preferences/shared_preferences.dart';
// 导入数据模型
import '../models/weather_models.dart';
// 导入 JSON 序列化
import 'dart:convert';
验证:
- ✅ 确认所有导入语句正确
- ✅ 确认没有导入错误
2. 🔧 添加状态变量
文件路径: lib/screens/weather_detail_page.dart
操作步骤:
- 📝 在
_WeatherDetailPageState类中添加以下状态变量:
class _WeatherDetailPageState extends State<WeatherDetailPage> {
  // API 密钥(实际使用时应该从配置文件或环境变量读取)
  static const String _apiKey = '和风天气控制台获取API KEY';

  // API 基础地址
  static const String _baseUrl = '和风天气控制台获取API HOST';

  // PageController 用于控制卡片滑动
  late PageController _pageController;

  // 城市列表
  List<Location> _cities = [];

  // 当前选中的城市索引
  int _currentCityIndex = 0;

  // 城市天气数据映射(城市ID -> 天气数据)
  final Map<String, Map<String, dynamic>> _cityWeatherData = {};

  // 预报天数选项
  final List<Map<String, String>> _forecastDays = [
    {'value': '3d', 'label': '3天'},
    {'value': '7d', 'label': '7天'},
    {'value': '10d', 'label': '10天'},
    {'value': '15d', 'label': '15天'},
    {'value': '30d', 'label': '30天'},
  ];

  String _selectedDays = '7d'; // 默认7天

  // 数据状态
  bool _isLoading = false;
  String? _errorMessage;

  // 展开的预报项索引(按城市ID存储)
  final Map<String, Set<int>> _expandedIndices = {};

  // 滑动偏移量(用于堆叠效果)
  final Map<int, double> _cardOffsets = {};
}
关键点说明:
-
PageController:
_pageController- 控制 PageView 的滑动行为- 用于实现左右滑动切换城市
-
城市列表:
_cities- 存储所有城市信息_currentCityIndex- 当前选中的城市索引
-
天气数据映射:
_cityWeatherData- 以城市ID为键,存储每个城市的天气数据- 提高数据访问效率
验证:
- ✅ 确认所有状态变量已添加
- ✅ 确认类型声明正确
3. 📥 实现加载城市列表方法
文件路径: lib/screens/weather_detail_page.dart
操作步骤:
- 📝 在
initState()方法中初始化 PageController 并加载城市:
void initState() {
super.initState();
_pageController = PageController(initialPage: 0);
_loadCities();
}
void didChangeDependencies() {
super.didChangeDependencies();
// 当页面重新显示时,检查城市列表是否有变化
_checkAndReloadCities();
}
void dispose() {
_pageController.dispose();
super.dispose();
}
/// 📥 加载城市列表
///
/// **功能说明:** 从 SharedPreferences 中读取已保存的城市列表
Future<void> _loadCities() async {
try {
final prefs = await SharedPreferences.getInstance();
final citiesJson = prefs.getString('saved_cities');
if (citiesJson != null && citiesJson.isNotEmpty) {
final List<dynamic> citiesList = jsonDecode(citiesJson);
final cities = citiesList
.map((json) => Location.fromJson(json as Map<String, dynamic>))
.toList();
// 如果没有保存的城市,添加默认城市
if (cities.isEmpty) {
cities.add(Location(
name: '北京',
id: '101010100',
lat: '39.9042',
lon: '116.4074',
adm2: '北京',
adm1: '北京市',
country: '中国',
tz: 'Asia/Shanghai',
utcOffset: '+08:00',
isDst: '0',
type: 'city',
rank: '10',
fxLink: '',
));
}
setState(() {
_cities = cities;
_currentCityIndex = 0;
});
// 加载所有城市的天气数据
await _loadAllCitiesWeather();
} else {
// 如果没有保存的城市,使用默认城市
final defaultCity = Location(
name: '北京',
id: '101010100',
lat: '39.9042',
lon: '116.4074',
adm2: '北京',
adm1: '北京市',
country: '中国',
tz: 'Asia/Shanghai',
utcOffset: '+08:00',
isDst: '0',
type: 'city',
rank: '10',
fxLink: '',
);
setState(() {
_cities = [defaultCity];
_currentCityIndex = 0;
});
await _loadAllCitiesWeather();
}
} catch (e) {
debugPrint('加载城市列表失败: $e');
// 使用默认城市
final defaultCity = Location(
name: '北京',
id: '101010100',
lat: '39.9042',
lon: '116.4074',
adm2: '北京',
adm1: '北京市',
country: '中国',
tz: 'Asia/Shanghai',
utcOffset: '+08:00',
isDst: '0',
type: 'city',
rank: '10',
fxLink: '',
);
setState(() {
_cities = [defaultCity];
_currentCityIndex = 0;
});
await _loadAllCitiesWeather();
}
}
关键点说明:
-
PageController 初始化:
PageController(initialPage: 0)- 初始页面为第一个城市- 必须在
dispose()中释放资源
-
城市列表加载:
- 从 SharedPreferences 读取保存的城市列表
- 如果没有城市,使用默认城市(北京)
-
错误处理:
- 捕获异常,使用默认城市作为降级方案
验证:
- ✅ 确认 PageController 已初始化
- ✅ 确认
didChangeDependencies已添加 - ✅ 确认城市列表加载逻辑正确
- ✅ 确认错误处理已添加

4. 🔍 实现检查并重新加载城市列表方法
文件路径: lib/screens/weather_detail_page.dart
操作步骤:
- 📝 添加
_checkAndReloadCities()方法:
  /// 🔍 检查并重新加载城市列表
  ///
  /// **功能说明:** 检查 SharedPreferences 中的城市列表是否有变化,如果有新城市添加,则重新加载
  Future<void> _checkAndReloadCities() async {
    try {
      final prefs = await SharedPreferences.getInstance();
      final citiesJson = prefs.getString('saved_cities');

      if (citiesJson == null || citiesJson.isEmpty) {
        // 如果没有保存的城市,且当前也没有城市,则加载默认城市
        if (_cities.isEmpty) {
          await _loadCities();
        }
        return;
      }

      final List<dynamic> citiesList = jsonDecode(citiesJson);
      final newCities = citiesList
          .map((json) => Location.fromJson(json as Map<String, dynamic>))
          .toList();

      // 如果没有保存的城市,添加默认城市
      if (newCities.isEmpty) {
        newCities.add(Location(
          name: '北京',
          id: '101010100',
          lat: '39.9042',
          lon: '116.4074',
          adm2: '北京',
          adm1: '北京市',
          country: '中国',
          tz: 'Asia/Shanghai',
          utcOffset: '+08:00',
          isDst: '0',
          type: 'city',
          rank: '10',
          fxLink: '',
        ));
      }

      // 比较城市列表是否有变化(通过城市ID列表比较)
      final currentCityIds = _cities.map((c) => c.id).toSet();
      final newCityIds = newCities.map((c) => c.id).toSet();

      // 检查是否有新城市添加
      final addedCityIds = newCityIds.difference(currentCityIds);
      // 检查是否有城市删除
      final removedCityIds = currentCityIds.difference(newCityIds);

      // 如果有城市添加或删除,重新加载
      if (addedCityIds.isNotEmpty || removedCityIds.isNotEmpty) {
        // 保存当前城市ID(如果当前城市还在列表中)
        final currentCityId = _cities.isNotEmpty &&
            _currentCityIndex < _cities.length
            ? _cities[_currentCityIndex].id
            : null;

        // 更新城市列表
        setState(() {
          _cities = newCities;

          // 如果当前城市还在列表中,保持索引;否则重置为0
          if (currentCityId != null && newCityIds.contains(currentCityId)) {
            final newIndex = newCities.indexWhere((c) => c.id == currentCityId);
            _currentCityIndex = newIndex >= 0 ? newIndex : 0;
          } else {
            _currentCityIndex = 0;
          }
        });

        // 更新 PageController 到新的索引
        if (_pageController.hasClients && _currentCityIndex < _cities.length) {
          _pageController.jumpToPage(_currentCityIndex);
        }

        // 如果有新城市添加,只加载新城市的天气数据;否则重新加载所有城市
        if (addedCityIds.isNotEmpty) {
          // 只加载新添加城市的天气数据
          await _loadMissingCitiesWeather(addedCityIds.toList());

          // 删除已移除城市的天气数据
          for (var removedId in removedCityIds) {
            _cityWeatherData.remove(removedId);
            _expandedIndices.remove(removedId);
          }
        } else {
          // 如果只是删除城市,重新加载所有城市的天气数据
          await _loadAllCitiesWeather();
        }
      } else {
        // 如果城市列表没有变化,只加载缺失城市的天气数据(如果有)
        final missingCityIds = newCityIds
            .where((id) => !_cityWeatherData.containsKey(id))
            .toList();

        if (missingCityIds.isNotEmpty) {
          // 只加载缺失城市的天气数据
          await _loadMissingCitiesWeather(missingCityIds);
        }
      }
    } catch (e) {
      debugPrint('检查城市列表失败: $e');
    }
  }

  /// 🌐 加载缺失城市的天气数据
  ///
  /// **功能说明:** 只加载指定城市ID列表的天气数据
  Future<void> _loadMissingCitiesWeather(List<String> cityIds) async {
    try {
      final futures = cityIds.map((cityId) async {
        final city = _cities.firstWhere((c) => c.id == cityId);
        try {
          final results = await Future.wait([
            _getCurrentWeather(city.id),
            _getDailyForecast(city.id),
          ]);

          return {
            'cityId': city.id,
            'weather': results[0] as WeatherResponse,
            'forecast': results[1] as DailyForecastResponse,
          };
        } catch (e) {
          debugPrint('加载城市 ${city.name} 天气失败: $e');
          return null;
        }
      }).toList();

      final results = await Future.wait(futures);

      setState(() {
        for (var result in results) {
          if (result != null) {
            _cityWeatherData[result['cityId'] as String] = {
              'weather': result['weather'],
              'forecast': result['forecast'],
            };
          }
        }
      });
    } catch (e) {
      debugPrint('加载缺失城市天气失败: $e');
    }
  }
关键点说明:
-
didChangeDependencies 生命周期:
- 当页面重新显示时自动调用
- 用于检测城市管理页面添加的新城市
-
城市列表变化检测:
- 通过比较城市ID集合检测变化
addedCityIds- 新添加的城市IDremovedCityIds- 删除的城市ID
-
智能加载策略:
- 如果有新城市添加,只加载新城市的天气数据(优化性能)
- 如果有城市删除,删除对应的天气数据
- 如果城市列表没有变化但缺少天气数据,只加载缺失的
-
索引保持:
- 如果当前城市还在列表中,保持当前索引
- 如果当前城市被删除,重置为第一个城市

验证:
- ✅ 确认
didChangeDependencies已添加 - ✅ 确认城市列表变化检测逻辑正确
- ✅ 确认只加载新城市的天气数据(性能优化)
- ✅ 确认索引保持逻辑正确
5. 🌐 实现加载所有城市天气数据方法
文件路径: lib/screens/weather_detail_page.dart
操作步骤:
- 📝 添加
_loadAllCitiesWeather()方法:
  /// 🌐 加载所有城市的天气数据
  ///
  /// **功能说明:** 并发加载所有城市的天气数据
  Future<void> _loadAllCitiesWeather() async {
    if (_cities.isEmpty) return;

    setState(() {
      _isLoading = true;
      _errorMessage = null;
    });

    try {
      // 并发加载所有城市的天气数据
      final futures = _cities.map((city) async {
        try {
          final results = await Future.wait([
            _getCurrentWeather(city.id),
            _getDailyForecast(city.id),
          ]);

          return {
            'cityId': city.id,
            'weather': results[0] as WeatherResponse,
            'forecast': results[1] as DailyForecastResponse,
          };
        } catch (e) {
          debugPrint('加载城市 ${city.name} 天气失败: $e');
          return null;
        }
      }).toList();

      final results = await Future.wait(futures);

      setState(() {
        for (var result in results) {
          if (result != null) {
            _cityWeatherData[result['cityId'] as String] = {
              'weather': result['weather'],
              'forecast': result['forecast'],
            };
          }
        }
        _isLoading = false;
      });
    } catch (e) {
      setState(() {
        _errorMessage = '加载失败: $e';
        _isLoading = false;
      });
    }
  }
关键点说明:
-
并发加载:
- 使用
Future.wait()并发加载所有城市的天气数据 - 提高加载效率,减少等待时间
- 使用
-
数据存储:
- 使用 Map 存储每个城市的天气数据
- 以城市ID为键,方便快速访问
-
错误处理:
- 单个城市加载失败不影响其他城市
- 使用
debugPrint记录错误信息
验证:
- ✅ 确认使用了并发加载
- ✅ 确认数据存储结构正确
- ✅ 确认错误处理已添加
6. 🎴 实现堆叠式卡片视图
文件路径: lib/screens/weather_detail_page.dart
操作步骤:
- 📝 添加
_buildStaggeredGridView()方法:
  /// 🎴 构建堆叠式卡片视图
  ///
  /// **功能说明:** 使用 Stack 和 PageView 实现堆叠式多城市天气卡片切换
  Widget _buildStaggeredGridView() {
    if (_cities.isEmpty) {
      return Center(
        child: Column(
          mainAxisAlignment: MainAxisAlignment.center,
          children: [
            Icon(
              Icons.location_off,
              size: 64,
              color: Colors.grey.shade300,
            ),
            const SizedBox(height: 16),
            Text(
              '暂无城市',
              style: TextStyle(
                fontSize: 16,
                color: Colors.grey.shade600,
              ),
            ),
            const SizedBox(height: 8),
            Text(
              '请在"城市管理"中添加城市',
              style: TextStyle(
                fontSize: 14,
                color: Colors.grey.shade500,
              ),
            ),
          ],
        ),
      );
    }

    return Stack(
      children: [
        // 背景卡片(堆叠效果)
        ...List.generate(
          _cities.length,
          (index) {
            if (index >= _currentCityIndex || index < _currentCityIndex - 2) {
              return const SizedBox.shrink();
            }

            final offset = (_currentCityIndex - index) * 8.0;
            final scale = 1.0 - (index - _currentCityIndex).abs() * 0.05;
            final opacity = 1.0 - (index - _currentCityIndex).abs() * 0.3;

            return Positioned.fill(
              top: offset,
              left: offset,
              right: -offset,
              bottom: -offset,
              child: Transform.scale(
                scale: scale.clamp(0.9, 1.0),
                child: Opacity(
                  opacity: opacity.clamp(0.3, 1.0),
                  child: _buildCityCard(index, isActive: false),
                ),
              ),
            );
          },
        ),
        // 当前卡片(PageView)
        PageView.builder(
          controller: _pageController,
          onPageChanged: (index) {
            setState(() {
              _currentCityIndex = index;
            });
          },
          itemCount: _cities.length,
          itemBuilder: (context, index) {
            return _buildCityCard(index, isActive: true);
          },
        ),
      ],
    );
  }
关键点说明:
-
Stack 布局:
- 使用
Stack实现堆叠效果 - 背景卡片使用
Positioned.fill定位
- 使用
-
堆叠效果:
offset- 卡片偏移量,实现堆叠视觉scale- 卡片缩放比例,后面的卡片更小opacity- 卡片透明度,后面的卡片更透明
-
PageView:
PageView.builder- 实现左右滑动切换onPageChanged- 滑动回调,更新当前城市索引
验证:
- ✅ 确认 Stack 布局正确
- ✅ 确认堆叠效果已实现
- ✅ 确认 PageView 滑动功能正常

7. 🏙️ 实现单个城市卡片构建方法
文件路径: lib/screens/weather_detail_page.dart
操作步骤:
- 📝 添加
_buildCityCard()方法:
  /// 🏙️ 构建单个城市卡片
  ///
  /// **功能说明:** 构建单个城市的天气详情卡片
  Widget _buildCityCard(int index, {required bool isActive}) {
    if (index >= _cities.length) {
      return const SizedBox.shrink();
    }

    final city = _cities[index];
    final weatherData = _cityWeatherData[city.id];

    if (weatherData == null) {
      return Container(
        margin: const EdgeInsets.all(16),
        decoration: BoxDecoration(
          color: Colors.white,
          borderRadius: BorderRadius.circular(20),
          boxShadow: [
            BoxShadow(
              color: Colors.black.withValues(alpha: 0.04),
              blurRadius: 10,
              offset: const Offset(0, 2),
            ),
          ],
        ),
        child: Center(
          child: Column(
            mainAxisAlignment: MainAxisAlignment.center,
            children: [
              const CircularProgressIndicator(
                valueColor: AlwaysStoppedAnimation<Color>(Color(0xFF6366F1)),
              ),
              const SizedBox(height: 16),
              Text(
                '加载 ${city.name} 天气中...',
                style: TextStyle(
                  fontSize: 14,
                  color: Colors.grey.shade600,
                ),
              ),
            ],
          ),
        ),
      );
    }

    final weather = weatherData['weather'] as WeatherResponse;
    final forecast = weatherData['forecast'] as DailyForecastResponse;

    return RefreshIndicator(
      onRefresh: () async {
        if (index == _currentCityIndex) {
          await _refreshCurrentCityWeather();
        } else {
          final city = _cities[index];
          try {
            final results = await Future.wait([
              _getCurrentWeather(city.id),
              _getDailyForecast(city.id),
            ]);

            setState(() {
              _cityWeatherData[city.id] = {
                'weather': results[0] as WeatherResponse,
                'forecast': results[1] as DailyForecastResponse,
              };
            });
          } catch (e) {
            debugPrint('刷新城市 ${city.name} 天气失败: $e');
          }
        }
      },
      color: const Color(0xFF6366F1),
      child: SingleChildScrollView(
        physics: const AlwaysScrollableScrollPhysics(),
        child: Column(
          children: [
            const SizedBox(height: 8),

            // 当前天气卡片 - 简约风格
            if (weather.now != null)
              _buildCurrentWeatherCard(weather.now!, city),

            const SizedBox(height: 16),

            // 预报天数选择器 - 简约风格
            _buildForecastDaysSelector(),

            const SizedBox(height: 16),

            // 天气预报列表 - 简约风格
            if (forecast.daily != null)
              _buildForecastList(forecast.daily!, city.id),

            const SizedBox(height: 24),
          ],
        ),
      ),
    );
  }
关键点说明:
-
卡片状态:
isActive- 标识卡片是否为当前激活状态- 用于区分当前卡片和背景卡片
-
数据加载:
- 如果数据未加载,显示加载指示器
- 如果数据已加载,显示天气详情
-
下拉刷新:
- 使用
RefreshIndicator实现下拉刷新 - 支持刷新当前城市或其他城市的天气数据
- 使用
验证:
- ✅ 确认卡片构建逻辑正确
- ✅ 确认加载状态已处理
- ✅ 确认下拉刷新功能正常
8. 🔄 实现切换城市和撤销滑动方法
文件路径: lib/screens/weather_detail_page.dart
操作步骤:
- 📝 添加切换城市和撤销滑动方法:
  /// 🔄 切换城市
  ///
  /// **功能说明:** 切换到指定索引的城市
  void _switchCity(int index) {
    if (index >= 0 && index < _cities.length && index != _currentCityIndex) {
      setState(() {
        _currentCityIndex = index;
      });
      _pageController.animateToPage(
        index,
        duration: const Duration(milliseconds: 300),
        curve: Curves.easeInOut,
      );
    }
  }

  /// ↩️ 撤销滑动
  ///
  /// **功能说明:** 撤销当前滑动,回到上一个城市
  void _undoSwipe() {
    if (_currentCityIndex > 0) {
      _switchCity(_currentCityIndex - 1);
    }
  }
关键点说明:
-
切换城市:
_switchCity()- 切换到指定索引的城市- 使用
PageController.animateToPage()实现动画切换
-
撤销滑动:
_undoSwipe()- 回到上一个城市- 提供用户友好的撤销功能
验证:
- ✅ 确认切换城市功能正常
- ✅ 确认撤销滑动功能正常
- ✅ 确认动画效果流畅
9. 🎨 更新 AppBar 添加撤销按钮
文件路径: lib/screens/weather_detail_page.dart
操作步骤:
- 📝 修改 AppBar,添加撤销按钮:
      appBar: AppBar(
        title: Text(
          _cities.isNotEmpty && _currentCityIndex < _cities.length
              ? _cities[_currentCityIndex].name
              : '天气详情',
          style: const TextStyle(
            fontWeight: FontWeight.w600,
            fontSize: 18,
            color: Colors.black87,
          ),
        ),
        backgroundColor: Colors.white,
        elevation: 0,
        centerTitle: true,
        actions: [
          // 撤销滑动按钮
          if (_currentCityIndex > 0)
            IconButton(
              icon: Icon(Icons.undo, color: Colors.grey.shade700),
              onPressed: _undoSwipe,
              tooltip: '撤销滑动',
            ),
          // 刷新按钮
          IconButton(
            icon: Icon(Icons.refresh, color: Colors.grey.shade700),
            onPressed: _refreshCurrentCityWeather,
            tooltip: '刷新',
          ),
        ],
      ),
关键点说明:
-
动态标题:
- 显示当前选中城市的名称
- 如果没有城市,显示默认标题
-
撤销按钮:
- 只在不是第一个城市时显示
- 点击后回到上一个城市
验证:
- ✅ 确认 AppBar 标题动态更新
- ✅ 确认撤销按钮显示逻辑正确
- ✅ 确认按钮功能正常
🎨 UI 设计要点
- 🎨 堆叠式展示:使用 Stack 和 Positioned 实现卡片堆叠效果
- 👆 滑动切换:使用 PageView 实现左右滑动切换城市
- 📱 响应式布局:适配不同屏幕尺寸,使用 SingleChildScrollView
- ⏳ 加载状态:显示紫色加载指示器和友好的加载提示
- ❌ 错误处理:友好的错误提示和重试机制
- 🎯 交互反馈:滑动动画、撤销功能、下拉刷新
常见错误及解决方案
🔧 错误处理流程图
错误 1:导入错误
错误信息:
Error: Could not find a file named "package:flutter_staggered_grid_view/flutter_staggered_grid_view.dart"
原因分析:
- 依赖未正确安装
- pubspec.yaml 配置错误
解决方案:
-
检查
pubspec.yaml中的依赖配置:dependencies: flutter_staggered_grid_view: ^0.7.0 -
重新安装依赖:
flutter pub get -
如果仍然失败,清理项目后重新安装:
flutter clean
flutter pub get
错误 2:PageController 未初始化
错误信息:
LateInitializationError: Field '_pageController' has not been initialized
原因分析:
- PageController 未在
initState()中初始化 - 在初始化前使用了 PageController
解决方案:
-
确保在
initState()中初始化:void initState() { super.initState(); _pageController = PageController(initialPage: 0); _loadCities(); } -
确保在
dispose()中释放资源:void dispose() { _pageController.dispose(); super.dispose(); }
错误 3:滑动不流畅
错误信息:
- 滑动卡顿
- 动画不流畅
原因分析:
- 动画时长设置不当
- 堆叠效果计算过于复杂
解决方案:
-
优化动画配置:
_pageController.animateToPage( index, duration: const Duration(milliseconds: 300), // 300ms 动画时长 curve: Curves.easeInOut, // 缓动曲线 ); -
减少堆叠卡片数量:
// 只显示当前卡片前后各2张卡片
if (index >= _currentCityIndex || index < _currentCityIndex - 2) {
  return const SizedBox.shrink();
}
错误 4:堆叠效果异常
错误信息:
- 卡片重叠不正确
- 偏移量计算错误
原因分析:
- 偏移量计算公式错误
- 缩放比例计算错误
解决方案:
-
检查偏移量计算:
final offset = (_currentCityIndex - index) * 8.0; // 每张卡片偏移8像素 -
检查缩放比例:
final scale = 1.0 - (index - _currentCityIndex).abs() * 0.05; scale: scale.clamp(0.9, 1.0), // 限制在0.9到1.0之间 -
检查透明度:
final opacity = 1.0 - (index - _currentCityIndex).abs() * 0.3;
opacity: opacity.clamp(0.3, 1.0),  // 限制在0.3到1.0之间
错误 5:数据加载失败
错误信息:
Exception: 加载失败
原因分析:
- 网络请求失败
- API 密钥错误
- 城市数据格式错误
解决方案:
-
检查网络连接
-
检查 API 密钥配置
-
检查城市数据格式:
final List<dynamic> citiesList = jsonDecode(citiesJson); final cities = citiesList .map((json) => Location.fromJson(json as Map<String, dynamic>)) .toList(); -
添加错误处理:
try {
  // 加载数据
} catch (e) {
  debugPrint('加载失败: $e');
  // 显示错误提示
}
总结
📊 完整实现流程图
📋 本教程完成的内容
本教程详细介绍了如何在 Flutter 项目天气详情页面中使用 flutter_staggered_grid_view 实现多城市天气卡片堆叠式展示和滑动切换功能。主要内容包括:
- ✅ 📦 引入三方库:添加
flutter_staggered_grid_view依赖到pubspec.yaml - ✅ 🌤️ 天气详情页面实现:在天气详情页面中实现多城市卡片切换
- 📥 加载城市列表(从 SharedPreferences 读取)
- 🔍 检查并重新加载城市列表(同步城市管理页面的新增城市)
- 🌐 并发加载所有城市天气数据
- 🎴 堆叠式卡片视图(使用 Stack + PageView)
- 🏙️ 单个城市卡片构建
- 🔄 切换城市和撤销滑动功能
- 🎨 AppBar 撤销按钮
- ✅ 🔧 错误处理:提供常见错误及解决方案,帮助新手快速解决问题
💡 关键要点
- 🎴 堆叠式展示:使用 Stack 和 Positioned 实现卡片堆叠效果
- 👆 滑动切换:使用 PageView 实现左右滑动切换城市
- 📊 数据管理:使用 Map 存储每个城市的天气数据,提高访问效率
- 🔄 并发加载:使用
Future.wait()并发加载所有城市天气数据 - 🔍 城市同步:使用
didChangeDependencies自动检测城市管理页面新增的城市 - ⚡ 智能加载:只加载新添加城市的天气数据,优化性能
- ↩️ 撤销功能:提供撤销滑动功能,提升用户体验
- 🛡️ 错误处理:完善的错误处理机制,确保应用稳定性
📚 参考资源
- 📖 flutter_staggered_grid_view 官方文档
- 📖 Flutter PageView 文档
- 📖 Flutter Stack 文档
🎉 祝你开发顺利! 🚀
欢迎加入开源鸿蒙跨平台社区